

LUK DAU TONG JYUN
綠[luk6]
豆[dau6]
湯[tong1]
圓[jyun4]
TANG YUAN / TONG YUAN
MUNG BEAN GLUTINOUS RICE BALLS
This is a very very VERY rough recipe for savory filled tong jyun (glutinous rice balls) I created to satisfy a craving for something familiar yet new. There’s not really any measurements because to be honest, I just don’t measure that much. Most of my cooking is by feeling and eye, and seasoning to taste. I’ve tried to focus more on what things should feel or look like in this recipe.
There are many variations of tong jyun across Asian cultures, but the way I grew up eating them will always be my favorite. My Paw-Paw would make them for Winter Solstice and would serve them in a simple pork/chicken based broth with daikon and lap cheong. As a child I was tasked with helping to make the dumplings. She would prepare the dough - never measuring anything - and I would get up on a stool and roll them into bite sized spheres and drop them into boiling water on the stove. It always amazed me how perfectly round and evenly sized hers were, and eventually I learned that skill as well.
Traditionally it is a dish eaten during the Winter Soltice, a day that is typically accompanied by family reunions and sharing meals at a round table. It’s a dish I would request at my last meal that I’ve made countless times, regardless of the solstice cycle. It can easily be made vegan and gluten free (glutinous rice does not contain gluten, despite the name).
-
Since writing this recipe I have tested a new filling - what I call lau saa tong jyun 流沙湯圓(lau4 saa1 tong1 jyun4). It balances savory salted duck egg yolks with rich evaporated milk that was cooked down and carmelized, blended with butter for lava like texture once cooked. They’re decadent. They’re delicious. They walk the line of savory and sweet in a way that most desserts don’t - actually I have already served these in savory and sweet broths and they work well in both. Will write that one up in the future as well.
The point being, although this recipe is for one thing, the general technique can lead to many variations. It all comes down to making a filling that can be preshaped and frozen, and getting better at the dough making/shaping process as you go along. You can also just make these dumplings without filling, which is what I grew up eating most of. Sometimes simple is best.
INGREDIENTS
wrapper:
glutinous rice flour
water
filling:
split and peeled mung beans
oyster mushroom
carrots
coconut cream
shallots
hemp seed hearts
peanut oil
cooking wine
wheat flour (skip for gluten free)
soy sauce (or tamari as a gluten free alternative)
salt
USEFUL EQUIPMENT
steamer set up or rice/pressure cooker
food processor
baking tray that fits in your freezer OR
ice cube trays with covers
clean kitchen towel
PREPARE THE FILLING
Rinse split mung beans under cold water. Drain.
If using a steamer set up - Soak mung beans in cold water for 2-4 hours. Drain. Spread mung beans out in an even layer in steamer. Fill pot with water level just below steamer - not touching the bottom and bring to a boil. Insert steamer and cover, bringing water down to medium boil and cook until the mung beans are soft, around 20 minutes. Total cooking time will vary upon how long your beans soaked and how old/dry they were. Refill water level by adding more boiling water if necessary. The end reesult should be mung beans that are not soggy and can be mashed easily.
If using a rice cooker - cook mung beans with a 1:2 mung beans to water (or stock) ratio.
Chop and cook other filling components - I finely chopped and fried the shallots in peanut oil first, put them aside, then proceeded to cook shredded carrots and chopped oyster mushrooms in the remaining oil, adding some soy sauce and cooking wine as though for a stir fry. The idea is to get some browning and extra flavor onto every part of the filling.
Back to the mung beans which should be done (soft and crumbly). Transfer into food processor along with the rest of the filling components and pulse until combined. Add a bit of coconut cream, pulse to incorporate. The end result should be a thick paste consistency, almost like dough. Chill the filling until it is firm enough for shaping.
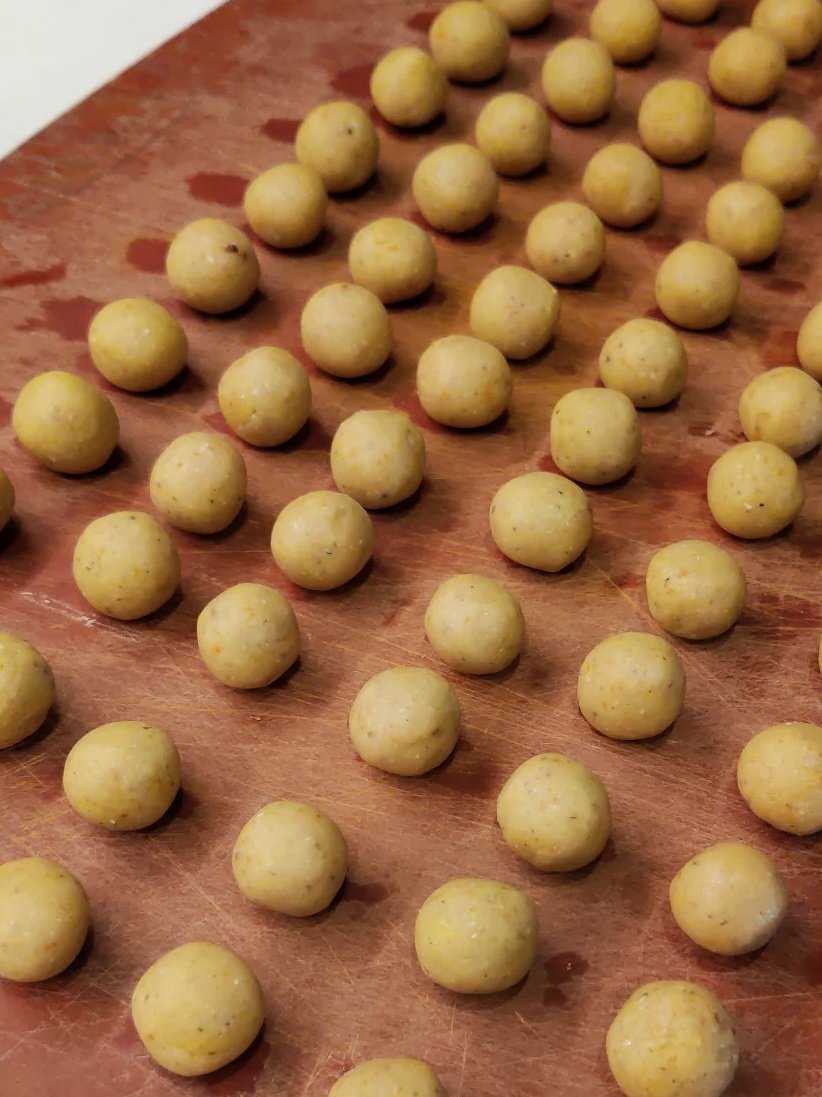
Get out a baking tray or ice cube tray. Using a small spoon or melon-baller, scoop bite sized amounts of filling and roll into spheres between your palms. Try to keep them uniform in size, around 2cm across is perfect. Place each ball on the tray, not letting them touch. Freeze them for 1 hour. Now they can be gently transferred into a bag until they are fully frozen without sticking together. This should take a few hours. You can do this part days or even weeks ahead of time.
PREPARE THE WRAPPER
Boil water and pour some into a measuring cup.
Pour some glutinous rice flour into a bowl. Using chopsticks create a small “pool” in the flour and add small amounts of the still hot water into the center of the flour at a time, mixing well with chopsticks. The flour will quickly absorb the water and you will see clumps of dough forming. They start off small and will slowly grow. You want to be sure to add the hot water slowly and a little at a time to prevent over hydrating the dough. Keep mixing - it may take a decent amount of force after a while.
Once it has reached a shaggy state, you should be able to start kneading the dough to create one solid mass. It should be soft, smooth, and pliable like Play-Doh, not leaving behind any milky white liquid (too much water!) and sticking to itself quite well. It should not stick to your dry hands. When kneading, it should not present any cracks or crumble when being handled (too dry / water not hot).
Keep covered with a kitchen towel or plate to prevent dough from drying out.
(Will add some more footage of this process at a later date.)

2 BECOME 1
Get your baking tray/ice cube trays out again and make sure they are clean and dry.
Take out your now fully frozen pre-shaped filling balls.
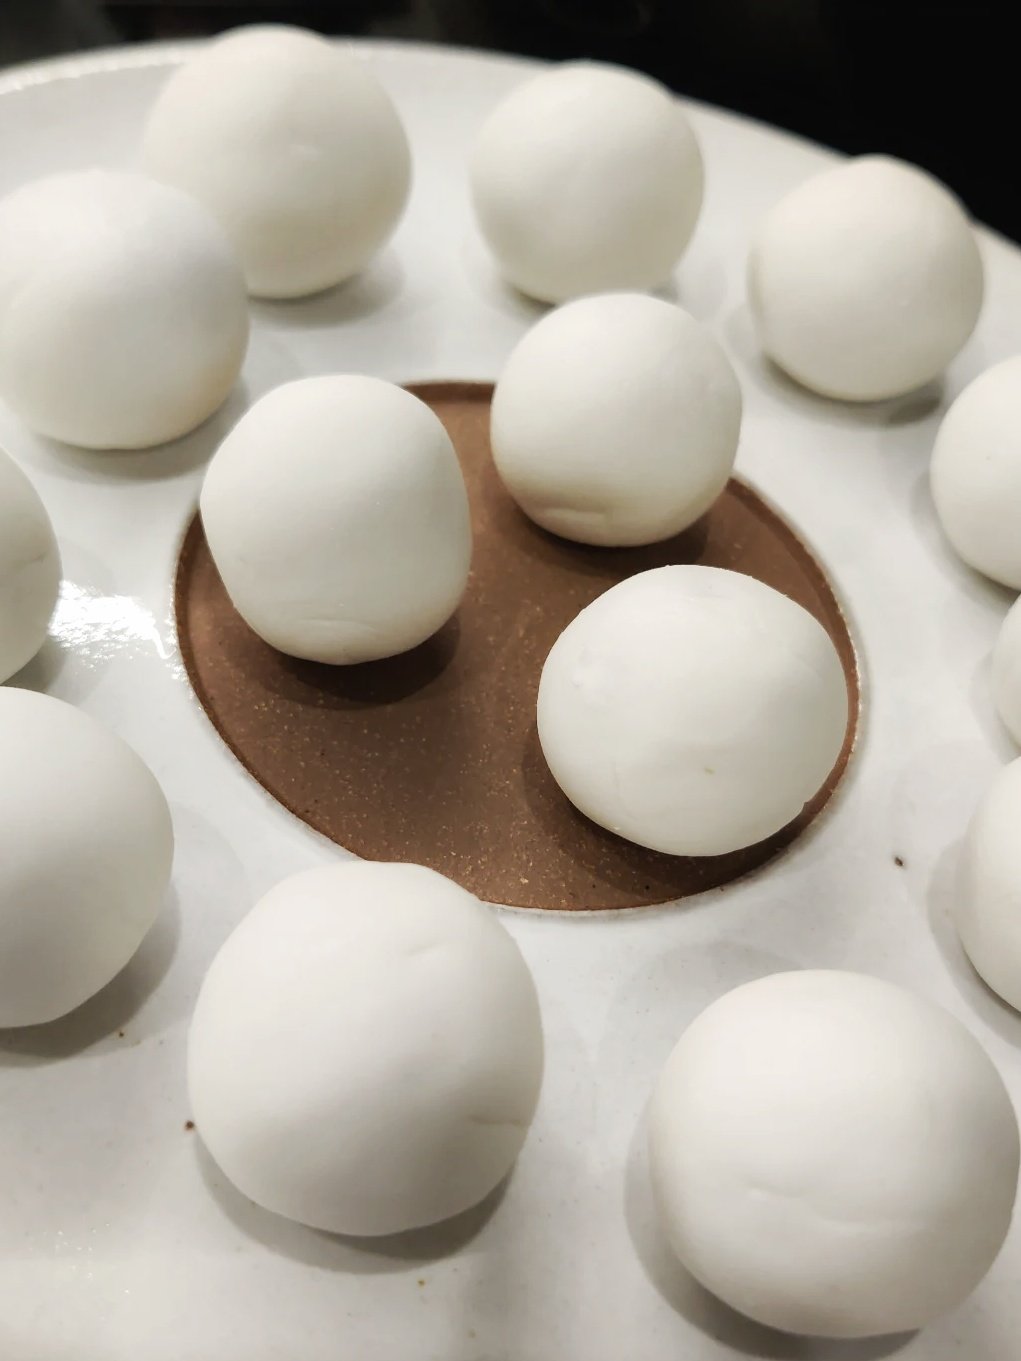
Pinch off an equal sized amount (about 2cm ball) of the glutinous rice dough, roll into a ball and flatten between your hands. Place solid filling in the center and snugly wrap the edges around the filling, being sure there are no gaps. Gently roll between palms to smooth out the shape. Ideally there are no air bubbles trapped inside the wrapper and an even outer layer all around. It might take some practice to figure out just how much you need to flatten the dough ball, but after making a few it gets easier.
Place finished dumplings onto tray (no touching) or 1 in each ice cube tray and repeat until finished / out of space. Put tray in freezer for 1 hour before transferring dumplings into a bag. If you notice the filling getting soft while you are working, take a break and put them back in the freezer. Keep dough covered to prevent it from drying out.
COOKING
Only cook as many dumplings as you are going to eat at the moment - once cooked these do not store well. It’s easy to cook another round if you want seconds.
Bring a pot of water to a boil. Carefully lower in frozen dumplings. When the water approaches full boil again, lower the heat so it is only gently bubbling. Add more cold water after a few minutes, then allow to come up to boiling again. Lower to a simmer and cook until the dumplings have been floating for about 1 minute. Overall process takes about 10 minutes. Remove with slotted spoon.
Serve in soup of your choice, or simply with some soy sauce and black vinegar. The soup I like best is a simple Chinese style chicken or vegetable broth with shiitake mushrooms, daikon radish, ginger, and scallions. Add in some lap cheong slices if you’re an omnivore. Best enjoyed while still very hot.
Or! Try stir frying them after boiling… 酸菜炒汤圆 Chili fried sweet black sesame Tangyuan with pickled mustard greens from Steph & Chris at Chinese Cooking Demystified. Video here. They use store bought black sesame tong jyun but you could totally level up with your own!

The label I created for this food project because 1) I love to make self branded projects out of everything, and 2) I had made so many I had to share them to make space in our freezer.